
A Rainbow of Crochet Trees
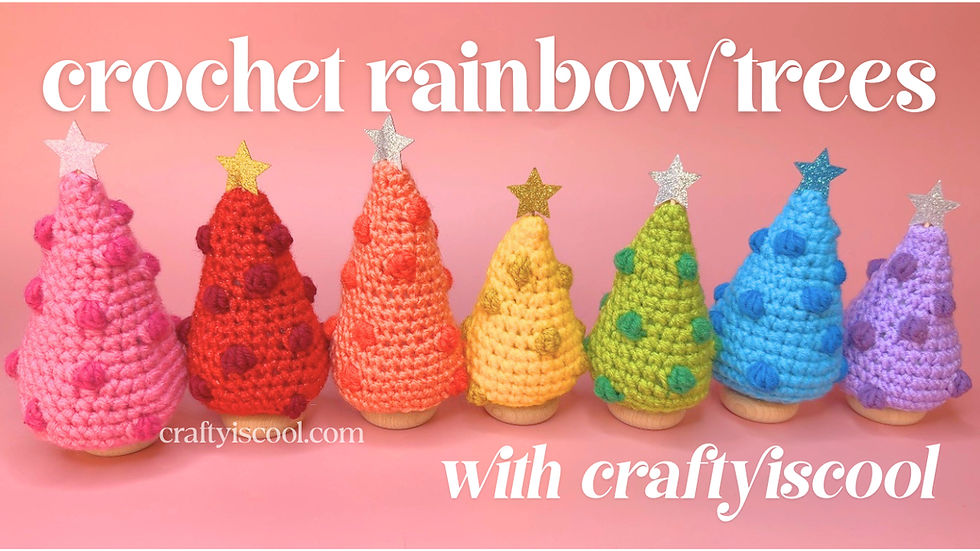
I have a folder on my phone called "inspiration". If I see something online that sparks my interest or makes me feel something, from colors, to shapes, or anything beautiful, I screenshot it. There is the most random stuff in that folder, and when I'm trying to think of what to make, I scroll through it. I noticed that there is a LOT of rainbow stuff. What can I say? I love color.
These trees were something I thought of for a while and they lend themselves really well to the whole rainbow aesthetic. I could have gone on forever coming up with different yarns to try, different colors, different textures. I am really feeling the tonal pink on pink, orange on orange, etc.
This pattern uses pretty much whatever yarn you want to use. If you have two yarns that are the same gauge, use those. Use the hook you like the best. Its that easy!
Rainbow Crochet Trees
Materials:
Yarn: DK, worsted, aran, or bulky in 2 colors
Polyfil
Wooden base (I use these wooden wheels from the craft store)
Glue (I use a hot glue gun)
Optional: Cupcake topper
Tools:
Crochet hook (choose a size at least 1mm smaller than recommended on yarn label)
Scissors
Stitch Key:
ch: chain
st: stitch
sc: single crochet
sc2tog: single crochet 2 stitches together
bobble: Yarn over, insert hook in next st, pull up loop, yarn over, pull through two loops. 2 loops on hook. Yarn over, insert hook in same st, pull up loop, yarn over, pull through two loops. 3 loops on hook. Yarn over, insert hook in same st, pull up loop, yarn over, pull through two loops. 4 loops on hook. Yarn over, pull through all the loops on the hook. One loop remains on hook. Bobble made!
Pattern:
With main color and crochet hook, make an adjustable loop, ch 1.
Rnd 1: Sc 4 into ring. Pull tail to close ring. (4 sts)
Rnd 2: *2 Sc in next st, sc in next st; rep from * around. (6 sts)
Rnd 3: *2 Sc in next st, sc in next 2 sts; rep from * around. (8 sts)
Rnd 4: *2 Sc in next st, sc in next 3 sts; rep from * around (10 sts)
Starting in Rnd 5 you will begin to incorporate bobble stitches. Work 2 bobble stitches evenly spaced within all ODD numbered rnds. Follow the pattern, adding bobble stitches every other round.
Rnd 5: 2 Sc in next st, sc in next 4 sts; rep from * around. (10 sts, 2 bobble sts)
Rnd 6: 2 Sc in next st, sc in next 5 sts; rep from * around. (14 sts, no bobble sts)
Rnd 7: 2 Sc in next st, sc in next 6 sts; rep from * around. (14 sts, 2 bobble sts)
Continue increasing by 2 sts in each round. Continue adding 2 bobble stitches anywhere in every ODD numbered round.
When the Tree is the size you want, continue crocheting the Base. Do not break the yarn.
Rnd 1: Working in the back loops of each st, sc2tog around.
Rnd 2: Working in both loops of each st, sc2tog around.
Your stitch count will vary based on how large you made your tree. Continue decreasing until you have 6-10 stitches remaining. Fasten off yarn and stuff tail inside.
Stuff tree firmly. Glue the wooden base to the tree. Finish with a tiny star, pompom, bead, or whatever you'd like. I used cupcake toppers!
Make sure you check out the full video tutorial here! If you make these rainbow trees I'd love to see them! Tag me on instagram @craftyiscool and I'll share them! Post your completed projects on Ravelry and let me know what yarn you used!


Comments